Costco mini quiches are a convenient and delicious option for entertaining, offering a perfect blend of savory flavors in bite-sized portions. These individual treats are easy to bake and reheat, making them ideal for breakfast, brunch, or snacks. With a flaky crust and customizable fillings, they cater to various tastes and dietary preferences. Perfect for large gatherings, mini quiches are a crowd-pleaser, ensuring a stress-free and enjoyable experience for hosts and guests alike. Preheat your oven to 400°F and bake for 12-14 minutes for golden-brown perfection.
What Are Costco Mini Quiches?
Costco mini quiches are pre-made, individual-sized savory pastries filled with ingredients like cheese, bacon, and vegetables. They are designed for convenience, offering a quick and easy baking solution. These bite-sized treats are perfect for entertaining, as they can be baked in minutes and served at any gathering. Available in varieties such as cheese and bacon or spinach and feta, they cater to diverse tastes. Simply bake them in a preheated oven at 400°F for 12-14 minutes until golden brown. Their portability and delicious flavor make them a popular choice for breakfast, brunch, or snacks.
Popularity of Mini Quiches for Entertaining
Mini quiches have become a favorite for entertaining due to their versatility and ease of serving. They are perfect for large gatherings, as they can be baked in bulk and served hot. The individual size makes them easy to grab and go, ideal for buffets or appetizer spreads. Their savory flavors and flaky crusts appeal to a wide range of palates, making them a hit at parties. Additionally, they can be reheated quickly, ensuring freshness throughout the event. This convenience and deliciousness have solidified their place as a top choice for hosts during the holiday season and beyond.
Ingredients and Tools Needed
Essential ingredients include eggs, milk, cheese, and pre-made crusts. Tools like baking sheets, ovens, and air fryers are crucial for baking. Ensure all items are ready for optimal results.

Key Ingredients for Mini Quiche Filling
The base of mini quiche filling typically includes eggs, milk, and cream, blended with seasonings. Cheese, such as cheddar or mozzarella, adds richness and flavor. Optional additions like diced ham, bacon, spinach, or scallions provide customization. For vegetarian options, vegetables like bell peppers or mushrooms can be incorporated. The filling is poured into pre-made crusts, ensuring a balanced savory taste. These ingredients create a creamy, flavorful center that complements the flaky crust, making mini quiches a versatile and delicious choice for any meal or gathering.
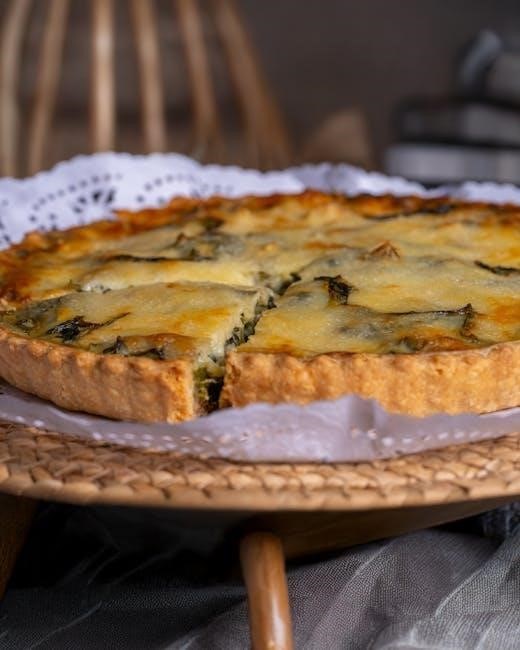
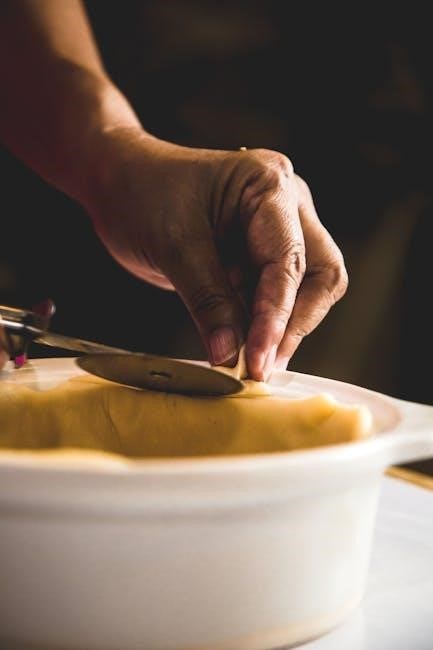
Importance of the Crust in Mini Quiches
The crust is the foundation of mini quiches, providing structure and texture. A flaky, golden-brown crust enhances the overall flavor and presentation. Pre-made crusts save time and ensure consistency, while homemade options allow for customization. The crust must be sturdy enough to hold the filling without becoming too dense. Proper baking ensures a crispy exterior and a tender interior, balancing the savory filling. A well-baked crust elevates the quiche, making it a delightful treat for any occasion. Its texture and appearance are key to the dish’s appeal and success.
Essential Baking Tools and Equipment
To achieve perfect mini quiches, the right tools are crucial. A sturdy baking sheet lined with parchment paper ensures even cooking and prevents sticking. Mini muffin tins are ideal for portion control and uniform shapes. A reliable oven is essential for consistent baking, while an air fryer offers a quicker alternative. Mixing bowls, measuring cups, and a whisk are necessary for preparing the filling. A fork or pastry brush helps with egg mixture blending and crust handling. Proper tools ensure efficiency and perfection in baking mini quiches, making the process enjoyable and stress-free.

Baking Instructions for Costco Mini Quiches
Preheat your oven to 400°F. Place mini quiches on a baking sheet, leaving space between each. Bake for 12-14 minutes until golden. For crispiness, use an air fryer at 375°F for 6-8 minutes. Perfect for a quick and delicious snack or meal.
Preheating the Oven for Optimal Results
Preheating your oven to 400°F (200°C) is essential for baking Costco mini quiches. Ensure the oven reaches the desired temperature before placing the quiches inside. This step guarantees even cooking and a golden-brown crust. Allow the oven to preheat for at least 10-15 minutes to maintain consistent heat. For crispier results, you can also use a convection setting if available. Proper preheating prevents the quiches from sinking or undercooking, ensuring a fluffy interior and a perfectly baked exterior every time.
Placing Mini Quiches on the Baking Sheet
When placing Costco mini quiches on the baking sheet, ensure they are spaced 1 inch apart to allow even air circulation. Line the sheet with parchment paper or lightly grease it to prevent sticking. Arrange the quiches in a single layer, avoiding overcrowding, which can lead to uneven cooking. Gently place each quiche, maintaining their shape, and ensure the sheet is not overloaded. Proper placement ensures crisp, golden-brown crusts and prevents quiches from merging during baking. This step is crucial for achieving the best texture and presentation.
Baking Time and Temperature Guidelines
For optimal results, bake Costco mini quiches in a preheated oven at 400°F (200°C) for 12-14 minutes. This ensures a golden-brown crust and a cooked-through filling. If using an air fryer or convection oven, reduce the temperature to 325°F (165°C) and bake for 5-8 minutes. Monitor the quiches closely to avoid overcooking. The quiches are done when the crust is golden and the edges are crispy. Adjust baking time based on your oven’s performance and the quiches’ size for perfectly cooked treats every time.
Using an Air Fryer or Convection Oven
An air fryer or convection oven offers a faster and crispier alternative to traditional baking. Preheat the air fryer to 325°F (165°C) and place mini quiches in a single layer, leaving space for air circulation. Bake for 5-8 minutes, or until the crust is golden and the filling is heated through. For convection ovens, use the same temperature but slightly adjust the time based on the oven’s power. This method ensures a crispy exterior while maintaining a tender interior, perfect for quick reheating or baking from frozen.

Reheating and Serving Tips
Reheat mini quiches in the oven at 400°F for 5-8 minutes or use an air fryer for 3-6 minutes for crispiness. Serve warm for breakfast or brunch.
Reheating Mini Quiches in the Oven
To reheat mini quiches in the oven, preheat it to 400°F (200°C). Place the quiches on a baking sheet lined with parchment paper, leaving about 1 inch of space between each. Bake for 5-8 minutes, or until they are golden brown and crispy. This method ensures even heating and restores their flaky texture. For best results, serve warm, either on its own or paired with a side salad, fresh fruit, or toast for a satisfying breakfast or brunch option.
Reheating in an Air Fryer for Crispiness
For a crispy reheating option, preheat the air fryer to 400°F (200°C). Place mini quiches in a single layer, leaving space for air circulation. Cook for 3-6 minutes, or until golden brown and crispy. This method preserves the flaky crust and ensures even heating. Lightly spray with oil for extra crispiness. Serve warm, paired with a side salad or fresh fruit for a quick and delicious breakfast or snack. The air fryer’s efficiency makes it ideal for achieving restaurant-quality results at home.
Serving Suggestions for Breakfast or Brunch
Mini quiches are a versatile and elegant addition to any breakfast or brunch spread. Serve them alongside fresh fruit, yogurt parfaits, or a green salad for a balanced meal. Pair with a selection of artisanal cheeses, cured meats, and crusty bread for a hearty spread. For a festive touch, offer a variety of mini quiches with different fillings, such as cheese, bacon, or spinach, to cater to diverse tastes. They’re also perfect for grab-and-go meals or as a satisfying side dish. Their portability and flavor make them a crowd-pleaser for any gathering.
Storage and Shelf Life
Baked mini quiches can be stored in an airtight container in the fridge for up to 3 days. For longer storage, freeze them on a baking sheet, then transfer to a freezer-safe bag for up to 2 months. Always reheat thoroughly before serving.
Storing Baked Mini Quiches
Baked mini quiches should be cooled completely before storage to prevent moisture buildup. Store them in an airtight container in the refrigerator for up to 3 days. For longer storage, place cooled quiches on a baking sheet, freeze until solid, then transfer to a freezer-safe bag or container for up to 2 months. When freezing, ensure quiches are tightly sealed to maintain freshness. Always thaw frozen quiches in the fridge overnight before reheating. Proper storage helps preserve texture and flavor, ensuring your mini quiches remain delicious for future meals or gatherings.

Freezing Mini Quiches for Later Use
Freezing mini quiches is an excellent way to preserve them for future meals. Allow the baked quiches to cool completely on a wire rack before freezing to prevent moisture buildup. Place them on a baking sheet lined with parchment paper, ensuring they don’t touch each other, and freeze until solid. Transfer the frozen quiches to a freezer-safe bag or airtight container, labeling with the date. They can be stored for up to 2 months. When ready to eat, thaw overnight in the fridge or reheat directly from frozen in the oven or air fryer for a crispy texture.
Variations and Customization
Costco mini quiches offer versatility with various cheeses, meats like bacon or ham, and vegetarian options, allowing customization to suit any taste or dietary preference perfectly.
Adding Different Cheeses for Flavor
Enhance your Costco mini quiches by experimenting with various cheeses for unique flavor profiles. Cheddar adds a sharpness, while mozzarella provides creaminess. Gruyère or Parmesan can offer a nutty, savory taste. For a richer texture, combine cheeses like feta and goat cheese. These variations not only elevate the dish but also cater to different palates, making each bite a delightful experience. Whether you prefer bold or subtle flavors, the right cheese blend can transform your mini quiches into a culinary masterpiece.
Incorporating Meats like Bacon or Ham
Add a savory twist to your Costco mini quiches by incorporating meats like bacon or ham. Crispy bacon bits or diced ham add a smoky, meaty flavor that complements the eggs and cheese. For the best results, pre-cook bacon until crispy, then chop it into small pieces before mixing into the filling. Diced ham can be added directly to the mixture for a hearty texture. These additions not only enhance the flavor but also provide a satisfying protein boost, making the quiches more substantial and appealing to meat lovers. Experiment with different combinations to find your perfect balance of flavors and textures.
Vegetarian Options for Mini Quiches
Vegetarian mini quiches offer a flavorful and satisfying alternative, perfect for plant-based diets. Spinach, mushrooms, and bell peppers are popular choices, adding vibrant colors and fresh flavors. Costco’s Florentine quiche, made with mozzarella and spinach, is a delightful vegetarian option. For homemade versions, sautéed vegetables like zucchini, onions, and tomatoes can be mixed into the egg filling. Cheese varieties like cheddar or feta enhance the richness without meat. These quiches are versatile, allowing you to experiment with seasonal vegetables and herbs, ensuring a delicious and hearty treat for vegetarians and non-vegetarians alike.
Tips for Perfect Mini Quiches
Preheat the oven to 400°F, ensuring even baking. Leave space between quiches for proper air circulation. Monitor baking time closely to achieve golden-brown crusts and perfectly cooked fillings.

Avoiding Common Baking Mistakes
To ensure perfect mini quiches, avoid overfilling the crusts, as this can lead to spillage during baking. Don’t overcrowd the baking sheet, as this hinders even cooking. Always preheat the oven to the recommended temperature, typically 400°F, to prevent undercooked crusts. Overmixing the filling can make it dense, so blend ingredients just until combined. Keep an eye on the quiches during the last few minutes of baking to avoid burning. These simple precautions will help achieve golden, delicious results every time.
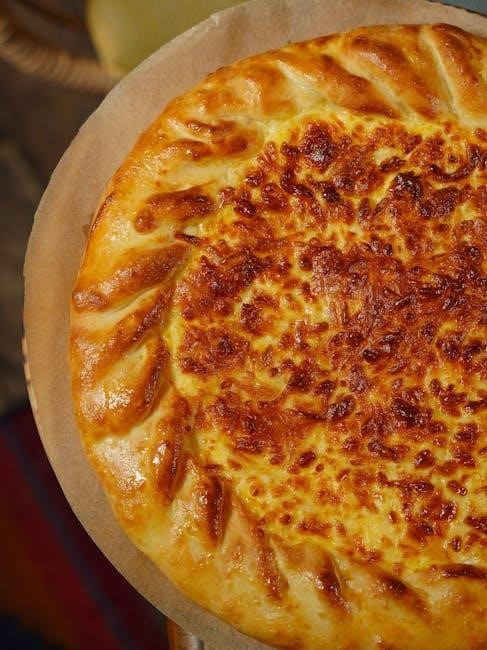
Ensuring Golden-Brown Crusts
To achieve golden-brown crusts, preheat the oven to 400°F and place mini quiches on the middle rack for even browning. Use a baking sheet lined with parchment paper to prevent sticking. Bake for 12-14 minutes, or until edges are golden. Avoid opening the oven too early, as this can prevent the crust from setting properly. For extra crispiness, bake for an additional 1-2 minutes, watching closely to avoid burning. Using an air fryer at 400°F for 3-6 minutes can also enhance crust color and texture. Proper baking techniques ensure a perfectly golden crust every time.
Handling and Serving for Large Groups
When serving Costco mini quiches to large groups, preheat the oven to 400°F and reheat batches for 5-8 minutes until warm. For crispiness, use an air fryer at 400°F for 3-6 minutes. Keep quiches warm on a serving tray or warming rack to maintain temperature. Arrange them attractively on a platter with fresh fruit or yogurt for a balanced presentation. This method ensures efficiency and satisfaction for big gatherings, making mini quiches a stress-free, crowd-pleasing option for any event or meal.
Dietary Considerations
For dietary flexibility, consider gluten-free crusts or low-fat dairy alternatives. Vegan options can be crafted by substituting eggs and cheese with plant-based ingredients, ensuring inclusivity for all diners.
Gluten-Free Crust Alternatives
For a gluten-free crust, use almond flour, coconut flour, or rice flour mixed with xanthan gum for structure. Combine with melted butter or oil, eggs, and seasonings. Press the mixture into molds for a sturdy base. Pre-bake at 350°F for 5-7 minutes to set before adding fillings. This ensures a crispy, golden crust without gluten. Alternatively, use pre-made gluten-free pie crusts for convenience. These options allow everyone, including those with dietary restrictions, to enjoy mini quiches without compromising on flavor or texture.
Low-Fat or Vegan Mini Quiche Options
For a low-fat version, substitute heavy cream with skim milk or Greek yogurt and reduce cheese quantity. Use egg whites instead of whole eggs for fewer calories. Vegan mini quiches can be made by replacing eggs with tofu or aquafaba and using plant-based milk and cheese. Preheat the oven to 375°F and bake for 15-20 minutes until set. These alternatives maintain flavor while catering to dietary preferences. Add spinach, mushrooms, or bell peppers for extra nutrition and taste, ensuring a delicious and guilt-free treat for all.
Safety Precautions
Always handle hot baking sheets with oven mitts to avoid burns. Never leave the oven unattended while baking mini quiches. Ensure proper ventilation in the kitchen.
Proper Handling of Hot Baking Sheets
Handling hot baking sheets requires caution to prevent burns. Always use oven mitts or tongs to remove sheets from the oven. Allow sheets to cool slightly before transferring mini quiches. Never leave hot sheets unattended, especially near children. Place sheets on heat-resistant surfaces to avoid damaging countertops. Avoid using wet mitts, as steam can cause burns. Proper handling ensures safety and prevents accidents in the kitchen. Always prioritize caution when working with hot baking equipment to maintain a safe cooking environment.
Food Safety Guidelines for Storage
Proper storage of Costco mini quiches is essential for maintaining freshness and safety. Cool baked quiches completely on a wire rack before refrigerating or freezing. Store in an airtight container in the refrigerator at 40°F or below for up to 3 days. For longer storage, place quiches on a baking sheet, freeze until solid, then transfer to a freezer-safe bag or container for up to 3 months. Avoid leaving quiches at room temperature for extended periods. Always reheat to an internal temperature of 165°F before serving. Proper storage ensures food safety and preserves flavor.
Conclusion
Baking Costco mini quiches is a delightful and convenient way to enjoy savory treats. With simple steps and customizable options, they offer a satisfying experience for any occasion. Experiment with flavors and share the joy of homemade goodness with family and friends!

Final Thoughts on Baking Costco Mini Quiches
Baking Costco mini quiches is a rewarding experience that combines simplicity with delicious results. Perfect for entertaining, these bite-sized treats offer versatility in both ingredients and serving options. Whether reheated in the oven or air fryer, they maintain their golden-brown crust and savory flavor. Experimenting with different cheeses, meats, or vegetarian options allows for personalized creations. With proper storage and handling, mini quiches remain fresh and ready to impress your guests. Embrace the joy of baking and share these delightful morsels at your next gathering for a truly memorable experience.
Encouragement to Experiment and Enjoy
Don’t hesitate to get creative with your Costco mini quiches! Try adding unique cheeses like goat cheese or feta for a tangy twist, or incorporate fresh herbs for a burst of flavor. For meat lovers, diced ham or crispy bacon adds a satisfying texture. Vegetarian options can feature roasted vegetables or spinach for a healthier twist. Remember, the key to perfect mini quiches is ensuring the crust is golden and the filling is well-balanced. Experiment with different combinations and enjoy the process of creating something truly special for your next gathering.