
Console table plans in PDF format offer detailed‚ step-by-step guides for crafting beautiful and functional tables. Perfect for DIY enthusiasts‚ these plans provide clear instructions‚ material lists‚ and diagrams to help you create a stunning console table tailored to your space and style. Whether you’re aiming for a rustic‚ modern‚ or farmhouse design‚ PDF plans ensure precision and ease‚ making your woodworking project enjoyable and successful.
1.1 Overview of Console Tables
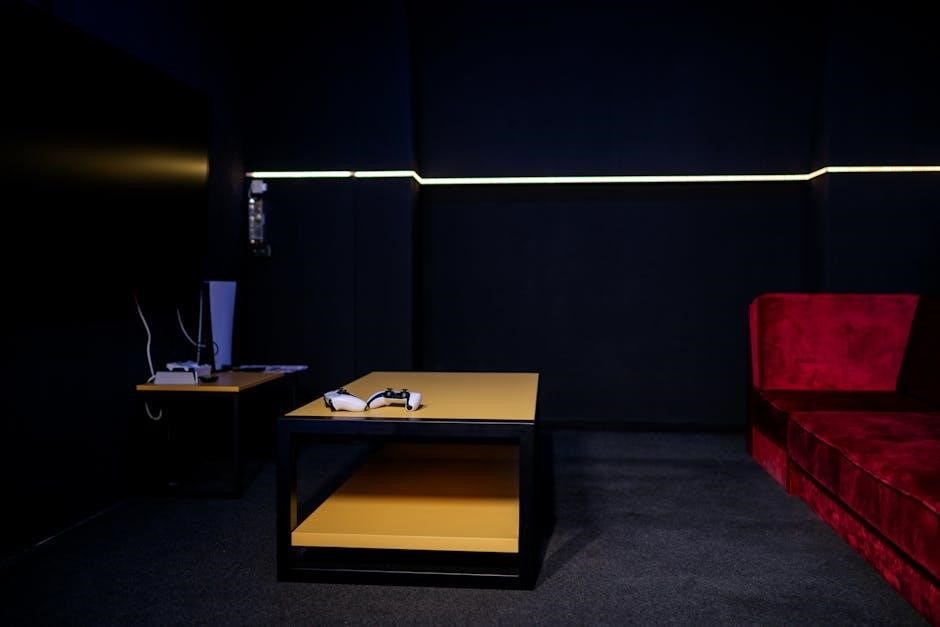
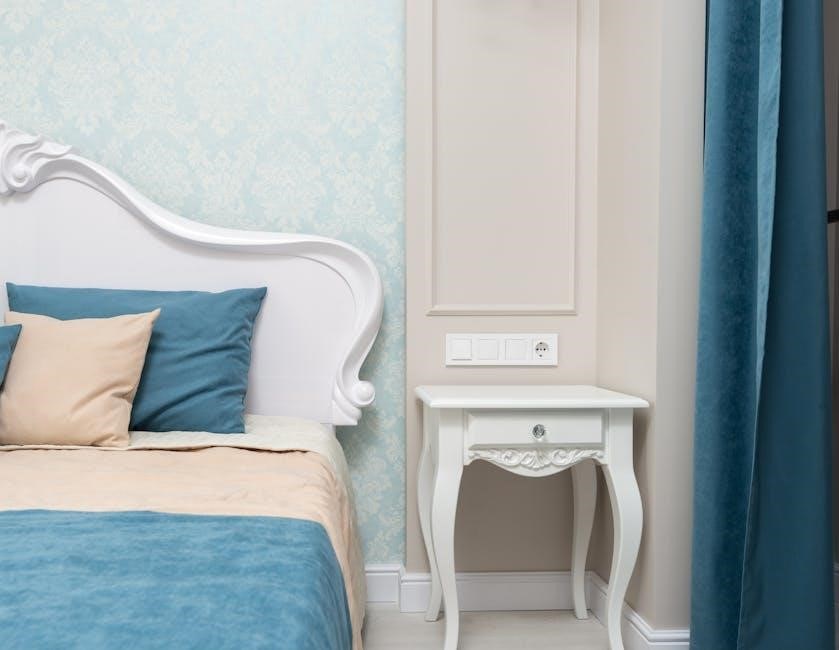
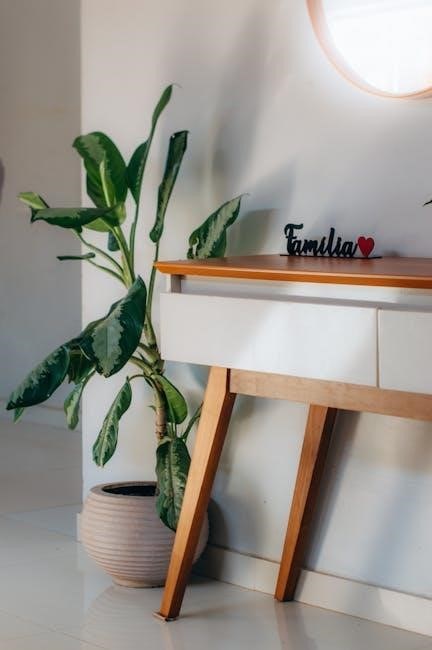
A console table is a versatile and elegant piece of furniture typically placed in entryways‚ hallways‚ or living rooms. It serves as a practical surface for displaying decor‚ storing items‚ or placing keys and mail. Console tables come in various styles‚ from rustic and farmhouse designs to modern and minimalist aesthetics. They often feature sleek lines‚ sturdy bases‚ and a flat top made from materials like wood‚ metal‚ or marble. Their compact size makes them ideal for small spaces while adding a touch of sophistication. With countless design options‚ console tables can easily complement any home’s interior‚ making them a popular project for DIY enthusiasts using detailed PDF plans.
1.2 Importance of Using PDF Plans
Using PDF plans for building a console table ensures clarity and precision‚ providing a comprehensive guide with detailed instructions and diagrams. These plans are easily accessible and can be downloaded instantly‚ offering a convenient way to start your project. They often include material lists‚ cutting diagrams‚ and step-by-step instructions‚ making the process manageable for DIY enthusiasts of all skill levels. PDF plans also allow for easy printing or digital viewing‚ keeping all necessary information organized in one place; This format helps avoid errors by providing precise measurements and visual aids‚ ensuring your console table turns out exactly as envisioned. They are a valuable resource for achieving professional-looking results at home.

Materials Needed for Building a Console Table
Essential materials include 2×6 lumber for legs‚ MDF or plywood for the top‚ screws‚ wood glue‚ sandpaper‚ and finishing materials like stain or paint for a polished look.
2.1 List of Required Lumber
To build a console table‚ you’ll need 2×6 lumber for the legs and frame‚ 3/4″ plywood or MDF for the tabletop‚ and 1×4 boards for supports or shelves. Additionally‚ 1×2 lumber can be used for extra bracing if desired. Ensure all wood is properly sanded and free of knots or warping. For a rustic look‚ consider using reclaimed or distressed wood. The exact quantities will depend on the size and design specified in your PDF plans. Always double-check your measurements before cutting to avoid waste and ensure a precise fit.
2.2 Essential Hardware and Fasteners
For assembling your console table‚ you’ll need 2.5″ wood screws for framing‚ 1.5″ screws for attaching the tabletop‚ and wood glue for strong joints. Brackets or corner clamps can add stability‚ while pocket hole screws are ideal for hidden joints. If using metal accents‚ bolts and washers may be required. Sandpaper and a drill with screwdriver and drill bits are essential tools. Always pre-drill holes to avoid splitting wood. Ensure all hardware is weather-resistant if the table will be outdoors. Refer to your PDF plans for specific fastener recommendations based on the design and weight capacity of your console table;
2.3 Finishing Materials
Finishing materials are crucial for protecting and enhancing the appearance of your console table. Polyurethane or varnish is commonly used to seal and protect the wood‚ while wax or oil can add a soft‚ natural sheen. Stains or dyes are ideal for achieving your desired color. Sandpaper is essential for smoothing the surface before applying finishes. Brushes or rags are typically used for application. Consider eco-friendly or water-based options if you prefer a safer‚ low-odor alternative. Always follow the manufacturer’s instructions for application and drying times. Your console table plans PDF may recommend specific finishes based on the design and intended use of the table‚ ensuring a professional and lasting result.
Tools Required for the Project
Essential tools for building a console table include a table saw‚ miter saw‚ drill/driver‚ jigsaw‚ pocket hole jig‚ and sanders. These ensure precise cuts‚ smooth assembly‚ and a professional finish.
3.1 Essential Power Tools
Building a console table requires essential power tools for precise cuts and smooth assembly. A table saw or miter saw is necessary for cutting lumber accurately. A drill/driver is used for drilling pilot holes and driving screws. A jigsaw comes in handy for curved cuts‚ while a sander ensures a smooth finish. Additionally‚ a router can be used for decorative edges‚ and a pocket hole jig simplifies joining wood pieces. These tools are fundamental for achieving professional results and ensuring the project’s success. Proper use of these tools will help you complete the console table efficiently and safely‚ resulting in a durable and visually appealing piece of furniture.
3.2 Specialized Tools for Advanced Techniques
For advanced techniques in console table construction‚ specialized tools can enhance precision and creativity. A box joint jig is ideal for creating strong‚ interlocking joints‚ while a router table allows for intricate edge profiles and decorative details. A keg pocket hole jig simplifies hidden joint connections‚ perfect for sleek designs. Additionally‚ a jigsaw is essential for curved cuts‚ enabling unique table shapes. These tools enable advanced woodworking methods‚ such as adding decorative trim or metal accents‚ and ensure a polished‚ professional finish. By incorporating these specialized tools‚ you can achieve complex designs and elevate your console table’s aesthetic appeal‚ making it a standout piece in any room. Proper use of these tools requires practice but yields exceptional results.

Design Considerations
Design considerations for console tables include style‚ size‚ and additional features. Choose a style that complements your space‚ such as rustic‚ modern‚ or farmhouse. Measure the area to ensure the table fits perfectly‚ and consider adding shelves or storage for functionality. Incorporate decorative elements like metal accents or trim for a personalized touch. These considerations help create a table that is both functional and aesthetically pleasing‚ enhancing your home decor while meeting your practical needs effectively.
4.1 Choosing the Right Style
Choosing the right style for your console table is essential to match your home decor. Popular styles include rustic‚ modern‚ and farmhouse designs. Rustic styles often feature natural wood finishes and distressed details‚ while modern designs emphasize clean lines and minimalist aesthetics. Farmhouse styles blend classic and country elements‚ such as shiplap or metal accents. Consider the existing furniture and architectural elements in your space to ensure a cohesive look. Many PDF plans offer customizable options‚ allowing you to adapt the design to suit your preferences. By selecting a style that aligns with your interior‚ you can create a console table that enhances your room’s ambiance and functionality.
4.2 Determining the Size and Dimensions
Determining the size and dimensions of your console table is crucial for ensuring it fits perfectly in your space. Measure the area where the table will go‚ considering the height‚ length‚ and width. Standard console tables typically range from 30 to 72 inches in length‚ 12 to 18 inches in depth‚ and 30 to 34 inches in height. Choose dimensions that complement the room’s proportions and allow for easy movement. Many PDF plans offer adjustable sizing‚ enabling you to customize the table to your specific needs. Consider the intended use and the items you plan to display to ensure the size is practical and visually balanced.
4.3 Incorporating Additional Features
Incorporating additional features into your console table can enhance its functionality and aesthetic appeal. Consider adding shelves or cabinets for storage‚ drawers for organization‚ or decorative elements like carvings or metal accents. Some plans include options for adjustable heights or built-in lighting‚ making the table more versatile. For a rustic look‚ you might incorporate natural wood elements or distressed finishes. PDF plans often provide guidance on how to add these features seamlessly‚ ensuring they complement the table’s design. Customizing your console table with extra details will make it stand out and better suit your personal style or specific needs. These enhancements can turn a simple table into a functional and stylish focal point in any room.

Step-by-Step Instructions
Console table plans PDFs provide clear‚ detailed guides from cutting lumber to final assembly. Follow instructions for preparing materials‚ precise cuts‚ frame assembly‚ and finishing touches to ensure success.
5.1 Preparing the Materials
Start by organizing all materials according to the cut list provided in the PDF plans. Verify the quantity and quality of each piece of lumber‚ ensuring they match the specifications. Check for any defects or warping and set aside damaged materials. Use a miter saw or circular saw to cut larger boards into manageable sizes. Sand all cut edges to smooth them out. Separate hardware and fasteners‚ labeling them for easy access during assembly. Gather all necessary tools and place them within reach. Finally‚ lay out the materials in a logical order to streamline the assembly process. Proper preparation ensures efficiency and accuracy in building your console table.
5.2 Cutting the Wood According to Plans
Accurate cutting is crucial for a professional finish. Use a miter saw or circular saw to make precise cuts based on the PDF plan’s cut list. Measure each piece carefully‚ ensuring dimensions match the design. Cut larger boards into smaller sections first‚ then refine them to final sizes. Use a square to verify straight cuts and sand edges to remove splinters. Label each cut piece with its designated use to avoid confusion. Double-check all cuts before moving forward‚ as errors can affect assembly. Organize the cut pieces neatly‚ ready for the next step. This step ensures all components fit together seamlessly during assembly.
5.3 Assembling the Table Frame
Start by assembling the table frame using the pre-cut pieces. Align the legs and aprons according to the PDF plan’s instructions. Use clamps to hold the components in place while drilling pilot holes for screws. Secure the joints with wood glue and screws‚ ensuring a sturdy structure. Double-check the frame’s squareness by measuring the diagonals. If using dowels or brackets‚ attach them now for added stability. Allow the glue to dry completely before proceeding. Sand any rough edges or excess glue. The frame should be level and rigid‚ ready to support the table top. Ensure all corners are flush and the assembly is visually appealing before moving on.
5.4 Attaching the Table Top
Place the pre-cut table top onto the assembled frame‚ ensuring proper alignment. Use clamps to hold the top firmly in place. Check that the overhang is even on all sides‚ as specified in the PDF plans. Drill pilot holes through the frame into the tabletop to avoid splitting the wood. Secure the top using screws or wood brackets‚ tightening evenly. For added stability‚ apply wood glue to the contact areas before screwing. Once attached‚ sand the edges where the top meets the frame for a smooth finish. Ensure the tabletop is flush and level with the frame. Allow any glue to dry completely before proceeding to the next step.
5.5 Adding Shelves or Storage
To enhance functionality‚ consider adding shelves or storage compartments to your console table. Measure the space below the tabletop or within the frame to determine the size of your shelves. Cut additional lumber according to the PDF plans or your design. Attach shelves using wood brackets or supports‚ ensuring they are level and secure. For a customization‚ add adjustable shelves or drawers. Sand all surfaces before attaching to ensure a smooth finish. Apply wood glue and screws for stability. Once installed‚ allow the adhesive to dry completely. Sand any rough edges and proceed with finishing. Refer to the PDF for specific measurements and techniques tailored to your design;
5.6 Sanding and Smoothing the Surface
Sanding is a critical step to ensure a smooth‚ professional finish for your console table. Begin by sanding all surfaces‚ including the tabletop‚ shelves‚ and legs‚ using medium-grit sandpaper to remove imperfections. Progress to finer grits for a polished look. Pay special attention to edges and corners to round them slightly for a safer‚ more finished appearance; Use a tack cloth or vacuum to remove dust between sanding stages. Once satisfied‚ lightly sand one final time to achieve a silky-smooth surface. Proper sanding ensures the finish adheres evenly and enhances the overall aesthetic of the table. Follow the PDF plans for specific sanding techniques tailored to your design. Sanding is the foundation for a flawless final finish. Always work in a dust-free environment for best results.
5.7 Applying the Finish
Applying the finish is the final step to protect and enhance the beauty of your console table. Choose a stain‚ paint‚ or sealant that complements your design‚ ensuring durability and aesthetic appeal; Follow the PDF plans for recommended finishes‚ such as water-based polyurethane for a rustic look or oil-based stains for a rich‚ vibrant color. Apply the finish evenly‚ working in thin layers to avoid drips or uneven coverage. Allow each coat to dry completely‚ following the manufacturer’s instructions‚ before lightly sanding and applying additional layers. For a professional result‚ ensure the surface is dust-free and well-prepared. The finish not only protects the wood but also brings out the grain and texture‚ completing your console table’s transformation; Always follow safety guidelines when working with chemicals.
5.8 Final Assembly and Installation
Final assembly and installation bring your console table to life. Once all components are prepared‚ refer to the PDF plans for precise instructions on attaching legs‚ shelves‚ or drawers. Use clamps to hold parts in place while securing them with screws or bolts. Ensure alignment and stability by checking the table’s levelness. For added stability‚ attach anti-tipping brackets if recommended. Finally‚ place the table in its intended location‚ ensuring it fits seamlessly with your room’s decor. Double-check all joints and surfaces for smoothness and proper alignment. With careful assembly‚ your console table will be sturdy‚ functional‚ and a perfect addition to your home.
Safety Tips and Best Practices
Always wear safety glasses and gloves when cutting or sanding. Ensure proper ventilation when using finishes. Keep loose clothing tied back and long hair secured. Maintain a clean workspace to avoid tripping hazards. Follow power tool manufacturer guidelines and never leave running tools unattended. Use push sticks or splitters for safer saw operations. Keep children and pets away from the work area. Regularly inspect tools for damage and ensure all blades are sharp. Properly store materials and tools after use to prevent accidents. A safe environment ensures a successful and enjoyable project outcome.
6.1 Safety Precautions While Cutting
When cutting wood or other materials‚ always wear safety glasses and a dust mask to protect yourself from debris. Ensure the workpiece is securely clamped to prevent unintended movement. Use a push stick or splitters when operating table saws to maintain control and avoid kickback. Keep fingers away from blades and cutting edges‚ maintaining a safe distance at all times. Avoid wearing loose jewelry or clothing that could get caught in tools. Ensure the cutting area is well-lit and free from distractions. Double-check measurements before making a cut to avoid costly mistakes. Never reach over a moving blade‚ and always turn off power tools before adjusting or cleaning them. Proper safety habits prevent accidents and ensure a smooth project workflow.
6.2 Proper Use of Power Tools
Using power tools safely and effectively is crucial for successful woodworking projects. Always wear safety glasses and keep loose clothing or jewelry tied back to avoid accidents. Ensure blades and bits are sharp and properly secured before operation. Use blade guards and splitters on table saws to prevent kickback. Maintain a firm grip on handheld tools and keep your workpiece stable. Never overreach or apply excessive pressure‚ as this can lead to loss of control. Regularly inspect tools for damage or wear and ensure they are properly maintained. Follow the manufacturer’s instructions for each tool and keep the work area clean and clutter-free. Proper training and familiarity with tool operation are essential for achieving professional results and ensuring safety.
6.3 Working in a Safe Environment
Creating a safe workspace is essential for a successful and injury-free woodworking experience. Ensure your workshop is well-ventilated to avoid inhaling dust and fumes. Keep the area clean and clutter-free to prevent tripping hazards. Always use protective gear like safety glasses and a dust mask when operating power tools. Maintain good lighting to clearly see your work and potential hazards. Store tools and materials properly to avoid accidental damage or injury. Keep a fire extinguisher nearby and ensure all electrical equipment is in good condition. By maintaining a safe and organized environment‚ you can focus on your console table project with confidence and efficiency.

Advanced Techniques
Enhance your console table with decorative trim‚ metal accents‚ or a rustic finish for a unique look. These advanced techniques add elegance and personalization to your project.
7.1 Adding Decorative Trim
Add decorative trim to elevate your console table’s design. Choose from various styles‚ such as carved wood‚ molding‚ or metal accents‚ to match your desired aesthetic. Measure and cut the trim precisely to fit the edges or legs of the table. Apply wood glue and secure it with clamps or nails for a sturdy finish. Sand the trim to ensure a smooth surface before staining or painting. This technique adds a touch of elegance‚ making your console table stand out. Consider contrasting materials or intricate patterns for a unique‚ personalized look that enhances the overall charm of your handmade piece.
7.2 Incorporating Metal Accents
Incorporating metal accents into your console table adds a modern or industrial touch. Use metal for legs‚ frame supports‚ or decorative inlays to create a striking contrast with the wood. Consider materials like wrought iron‚ steel‚ or aluminum for durability and aesthetic appeal. Metal accents can be polished‚ painted‚ or left raw for a rustic look. Ensure proper measurement and alignment when attaching metal components. Pre-drill holes to avoid splitting the wood and secure the accents with sturdy fasteners. For a seamless integration‚ match the metal finish with other hardware in the room. This technique allows you to blend industrial and traditional elements‚ resulting in a unique and visually appealing console table design.
7.3 Creating a Rustic Finish
Creating a rustic finish for your console table adds a charming‚ weathered look. Start by distressing the wood using sandpaper or tools to create scratches and dents. Apply a stain or paint‚ then wipe off excess to enhance the texture. For an aged appearance‚ use a glaze or wax to fill in the distressed areas. Allow the finish to dry completely before sealing with a clear coat. This technique works well with natural wood species like alder or pine. The rustic finish complements farmhouse or country-style decor‚ giving your console table a unique‚ vintage character. Follow the PDF plans for detailed instructions on achieving this timeless look.
Budget Considerations
Building a console table can be cost-effective with proper planning. Estimate material costs‚ such as wood and hardware‚ to stay within your budget. PDF plans often include cost-saving tips and material lists to help you manage expenses efficiently while creating a beautiful piece of furniture.
8.1 Estimating Costs
Estimating costs for building a console table involves calculating the price of materials‚ tools‚ and labor. Start by listing all required materials‚ such as lumber‚ hardware‚ and finishes‚ and research their current prices. Tools like saws‚ drills‚ and sanders may be additional expenses if you don’t already own them. Labor costs can be minimized by tackling the project yourself. PDF plans often include detailed material lists and cost estimates‚ making it easier to budget. For example‚ a basic console table might cost around $50-$100‚ depending on the wood and design complexity. Consider reclaimed or affordable wood options to reduce expenses without sacrificing quality. Planning ahead ensures your project stays within budget and avoids unexpected financial setbacks.
8.2 Saving Money on Materials
Saving money on materials for your console table project can be achieved through smart shopping and resourcefulness. Consider using reclaimed or recycled wood‚ which is often cheaper and adds a unique touch. Compare prices at local hardware stores‚ online retailers‚ and lumber yards to find the best deals. Opting for cost-effective wood species‚ such as pine or MDF‚ can significantly lower costs. Additionally‚ look for discounts‚ coupons‚ or seasonal sales on tools and finishes. Buying materials in bulk or repurposing items from previous projects can also help reduce expenses. Planning carefully and sticking to your list ensures you avoid unnecessary purchases‚ keeping your project budget-friendly without compromising quality.

Free Resources and PDF Plans
Explore free console table plans and PDF guides available online. Websites like Etsy and woodworking forums offer downloadable designs‚ from rustic to modern styles‚ to suit your project needs.

9.1 Where to Find Free Console Table Plans
Discovering free console table plans is easier than ever. Websites like Etsy‚ Pinterest‚ and woodworking forums offer a variety of downloadable PDF designs. Many DIY blogs and woodworking communities share detailed plans‚ complete with material lists and step-by-step instructions. Additionally‚ platforms like Woodworking Plans PDF and DIY Chat Room provide free resources. These platforms cater to various skill levels‚ ensuring you can find a plan that matches your expertise. Some plans even include exploded diagrams and cut lists‚ making the building process seamless. Start your project by exploring these resources and finding the perfect design for your console table.
9.2 Reviewing and Comparing Different Plans
When selecting a console table plan‚ it’s essential to review and compare different options to find the best fit for your project. Consider factors like design style‚ size‚ and skill level required. Check if the plan includes detailed instructions‚ diagrams‚ and material lists. Look for features such as storage options or decorative elements that align with your needs. Compare the estimated cost and time required for each plan. Reading reviews or testimonials from others who have used the plan can provide insights into its clarity and feasibility. Some plans may also offer additional resources‚ like cut lists or 3D models‚ to simplify the process. By evaluating these aspects‚ you can choose a plan that matches your vision and expertise.
Building a console table using PDF plans is a rewarding DIY project that combines creativity with practicality. With the right materials‚ tools‚ and instructions‚ you can create a beautiful and functional piece of furniture for your home. Remember to choose a plan that aligns with your skill level and design preferences. Once you’ve selected your plan‚ gather all materials‚ follow the steps carefully‚ and take your time to ensure precision. Completing your console table will give you a sense of accomplishment and enhance your home decor. Happy building‚ and enjoy the fruits of your labor!