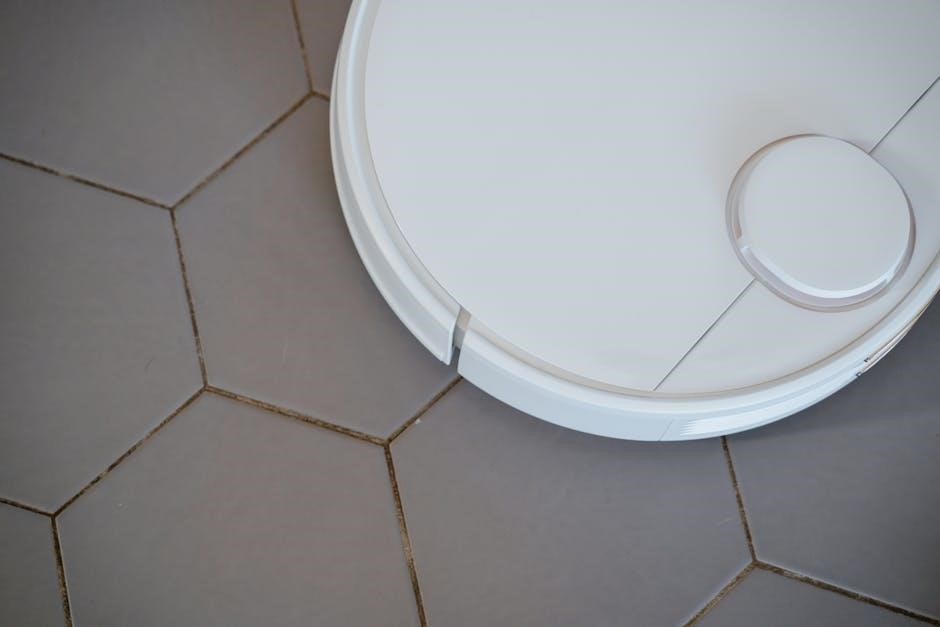
Shark’s AI Ultra Robot combines simplicity, intelligence, and powerful suction for a complete home clean, tackling dirt, pet hair, and various floor types effectively.
What’s in the Box?
Upon opening your Shark EZ Robot Vacuum (RV900S Series), ensure all components are present. You should find the robot vacuum itself, alongside the XL Self-Empty Base for convenient, hands-free disposal of collected debris. A charging dock is included to keep your robot powered and ready for cleaning.
Additionally, the box contains a user manual and a quick start guide to assist with setup and operation. You’ll also receive a power cord for the base, and potentially boundary strips to define no-go zones. Check for included accessories like a cleaning tool for brushroll maintenance, and replacement filters available at sharkaccessories.com.
Understanding Key Features
Your Shark AI Ultra Robot boasts advanced features for a superior cleaning experience. Matrix Clean Navigation ensures comprehensive coverage, cleaning in methodical passes to avoid missed spots. Powerful suction effectively removes dirt, dust, and pet hair from both hard floors and carpets.
The self-empty base provides weeks of hands-free cleaning, while intelligent features like no-go zones (using boundary strips) allow customized cleaning areas. AI technology enables the robot to learn your home’s layout and adapt cleaning patterns. Voice control integration offers convenient operation, enhancing overall usability.

Getting Started: Initial Setup
Begin by charging your Shark robot, then download the Shark Clean app to connect via Wi-Fi and unlock smart features for effortless control.
Charging the Robot
Before the first use, fully charge your Shark robot vacuum. Locate the charging dock and ensure it’s placed against a wall on a hard, level surface with at least three feet of clear space on either side.
Connect the power adapter to the charging dock and plug it into a wall outlet. Then, carefully place the robot onto the charging dock, ensuring the charging contacts align.
The robot’s power button will illuminate, indicating it’s charging. A full charge typically takes several hours, and the light will change to signify completion. It’s recommended to keep the robot on the dock when not in use to maintain optimal battery health.
Downloading the Shark Clean App
To unlock the full potential of your Shark robot vacuum, download the Shark Clean app from the App Store (iOS) or Google Play Store (Android). This app allows for remote control, scheduling, and access to advanced features like no-go zones and cleaning reports.
Search for “Shark Clean” in your app store and install the application. Once installed, open the app and create an account or log in if you already have one. The app will guide you through the process of connecting your robot to your Wi-Fi network.
Connecting to Wi-Fi
Ensure your smartphone is connected to a 2.4 GHz Wi-Fi network – the Shark robot does not support 5 GHz networks. Open the Shark Clean app and follow the on-screen instructions to add your robot. The app will search for your robot and prompt you to enter your Wi-Fi password.
During the connection process, the robot’s Wi-Fi indicator light will blink. Once successfully connected, the light will turn solid. If the connection fails, ensure the password is correct and try again, moving the robot closer to your router.
Navigation and Cleaning Modes
The Shark robot utilizes Matrix Clean Navigation for complete coverage, offering modes like Spot Cleaning and Deep Cleaning for customized floor care.
Matrix Clean Navigation Explained
Shark’s advanced Matrix Clean Navigation ensures a thorough and efficient cleaning experience. Unlike random navigation patterns, this system employs a methodical, back-and-forth cleaning path, systematically covering your floors. The robot doesn’t just bounce around; it intelligently maps and cleans in neat, overlapping lines.

This ensures no areas are missed, delivering a consistently clean result on both hard floors and carpets. The robot cleans in several passes, meticulously working to lift dirt, dust, and pet hair. This deliberate approach maximizes cleaning power and minimizes the chance of leaving behind any unwanted debris, providing a truly comprehensive clean.
Spot Cleaning Mode
Shark’s Spot Cleaning Mode is ideal for tackling localized messes and high-traffic areas requiring immediate attention. To initiate this mode, simply use the Shark Clean app or the robot’s controls to designate a specific zone – typically a 3ft x 3ft area.
The robot will then intensely focus its cleaning power on that selected spot, making multiple passes to ensure thorough debris removal. This feature is particularly useful for spills, crumbs, or areas where pet hair accumulates quickly. It provides a concentrated cleaning solution without requiring a full house clean, saving you time and energy.
Deep Cleaning Mode
Shark’s Deep Cleaning Mode is designed for a more thorough and intensive cleaning experience, perfect for homes with significant dirt buildup or high-pile carpets. Activated through the Shark Clean app, this mode instructs the robot to make repeated passes over areas, increasing suction power and dwell time.
The robot systematically cleans, ensuring maximum debris extraction from floors and carpets. This mode is ideal for allergy sufferers or households with pets, providing a deeper level of clean than standard cleaning modes. Expect a longer cleaning cycle when utilizing Deep Cleaning Mode, but the results will be noticeably improved.

Maintenance and Cleaning
Regular maintenance, including emptying the dustbin and cleaning the brushroll, is crucial for optimal performance and longevity of your Shark robot vacuum.
Emptying the Dustbin
To maintain peak suction power, regularly empty the dustbin of your Shark robot vacuum. Locate the dustbin release button, typically on the robot’s body or the self-empty base. Press the button to release and remove the dustbin. Hold the dustbin over a trash receptacle and press the release latch on the bottom to empty the collected debris.
Ensure all dust and debris are fully removed. For a more thorough clean, you can wash the dustbin with water, ensuring it is completely dry before reinstalling it back into the robot. Reinstall the dustbin securely until it clicks into place, guaranteeing proper operation during cleaning cycles.
Cleaning the Brushroll
Regular brushroll cleaning is crucial for optimal performance. First, power off the robot and carefully lift out the brushroll. Inspect the brushroll body and end caps for any tangled hair, string, or debris. Use your fingers or scissors to carefully remove these obstructions, avoiding cutting the brushroll itself.
Pay close attention to the metal cylinder within the end cap; if it falls out, reinsert it securely. Clean the brushroll thoroughly before reinstalling it, ensuring the flat end is inserted first. A clean brushroll ensures effective dirt and debris pickup.
Removing and Reinstalling the Brushroll
Before removing the brushroll, ensure the robot vacuum is powered off for safety. Gently lift the brushroll straight up and out of its housing. Take note of the orientation – the flat end of the brushroll is designed for a specific insertion point.
When reinstalling, align the flat end with its corresponding slot and press down firmly until it clicks into place. Verify it spins freely. Proper installation is vital for effective cleaning and prevents potential damage to the robot’s internal components.
Cleaning Hair and Debris from the Brushroll
With the brushroll removed, carefully inspect it for any tangled hair, string, or accumulated debris. Use your fingers or small scissors to gently remove these obstructions, being cautious not to damage the bristles. Pay close attention to the end caps, as hair often wraps around these areas.
Important: Avoid cutting the brushroll itself or any other robot parts during cleaning. A clean brushroll ensures optimal suction and cleaning performance, preventing clogs and maintaining the robot’s efficiency.
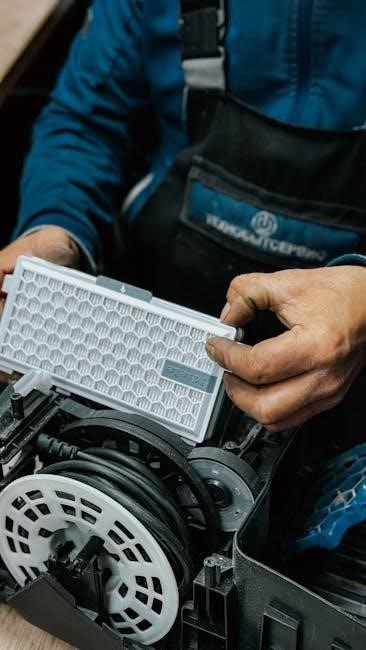
Replacing Filters
Maintaining clean filters is crucial for optimal suction and air quality. Regularly check your filter – replacement frequency depends on usage, but sharkaccessories.com offers replacements; To replace, locate the filter access panel (refer to your owner’s manual for specifics). Remove the old filter and insert the new one, ensuring a secure fit.
A clogged filter reduces cleaning performance and can strain the motor. Replacing filters regularly extends the life of your Shark robot and keeps your home environment fresh. Don’t operate the robot without a filter installed.
Troubleshooting Common Issues
If your Shark robot experiences problems, check for charging issues, connectivity errors, or a brushroll that isn’t spinning – solutions are available!
Robot Not Charging
If your Shark robot isn’t charging, first ensure the charging base is properly plugged into a working outlet and receiving power. Verify the robot is correctly positioned on the charging contacts – a solid connection is crucial.
Inspect the charging contacts on both the robot and the base for any dirt or debris, and clean them gently with a dry cloth. A loose connection or obstruction can prevent charging.
If the issue persists, try a different outlet to rule out a problem with the power source. Consult the user manual for specific troubleshooting steps related to your model, as error codes may indicate the cause.
Connectivity Problems
Experiencing connectivity issues with your Shark robot? First, confirm your smartphone or tablet is connected to a 2.4 GHz Wi-Fi network – the robot typically doesn’t support 5 GHz. Ensure the Shark Clean app is updated to the latest version, as updates often include bug fixes and improved compatibility.
Restart both your Wi-Fi router and the Shark robot. During the app setup, ensure you grant the app all necessary permissions, including location access. If problems continue, try resetting the robot’s Wi-Fi connection through the app’s settings menu.
Brushroll Not Spinning
If your Shark robot’s brushroll isn’t spinning, first power off the robot and carefully inspect the brushroll for tangled hair, strings, or debris. Remove any obstructions – this is a common cause! Ensure the brushroll is correctly reinstalled, with the flat end inserted first, and that the metal cylinder remains securely within the end cap.
Check for error codes displayed in the Shark Clean app, as these can pinpoint the issue. If the problem persists, a deeper cleaning of the brushroll and its housing might be necessary to remove hidden blockages.
Advanced Features & Settings
Utilize the Shark Clean app to schedule cleanings, define No-Go Zones, and enjoy seamless voice control integration for a customized cleaning experience.
Scheduling Cleanings
Shark’s robot vacuum offers convenient scheduling through the Shark Clean app, allowing you to automate your floor care routine. Within the app, you can set specific days and times for cleaning, tailoring the schedule to your lifestyle.
Customize cleaning frequency – choose daily, weekly, or even specific days of the week. You can also adjust the cleaning power based on your needs, selecting between Eco, Normal, or Max modes. The app provides a clear overview of your scheduled cleanings, ensuring your floors are consistently maintained without any manual intervention. Enjoy a consistently clean home with automated scheduling!
No-Go Zones & Boundary Strips
Utilize the Shark Clean app to establish virtual “No-Go Zones,” preventing the robot from entering restricted areas like pet food stations or delicate furniture arrangements. This feature provides precise control over the robot’s cleaning path, safeguarding your belongings.
Alternatively, employ physical Boundary Strips (sold separately) to create barriers for the robot. These strips are ideal for temporarily blocking access to specific areas during certain cleaning cycles. Combining both virtual and physical boundaries ensures comprehensive control, allowing you to customize the cleaning experience to perfectly suit your home’s layout and your preferences.
Voice Control Integration
Enjoy hands-free control of your Shark robot vacuum through seamless integration with popular voice assistants like Amazon Alexa and Google Assistant. Simply link your Shark Clean app account to your preferred voice platform to initiate cleaning cycles with simple voice commands.
Start, pause, or stop cleaning, send the robot back to its dock, or even request a spot clean—all without lifting a finger! This convenient feature adds an extra layer of ease to your cleaning routine, allowing you to manage your robot vacuum effortlessly from anywhere in your home.

Understanding Error Codes
Decoding error messages displayed by your Shark robot is crucial for quick troubleshooting and maintaining optimal performance, ensuring efficient cleaning cycles.
Decoding Common Error Messages
Your Shark robot vacuum communicates issues through specific error codes, displayed either on the robot itself or within the Shark Clean app. Understanding these messages is key to resolving problems quickly. For example, a “Brushroll Stuck” error indicates debris is tangled, requiring brushroll cleaning. A “Wheel Stuck” error suggests an obstruction hindering movement.
Connectivity errors often appear as “Wi-Fi Disconnected,” prompting a router check and app reconnection. Low battery triggers a “Charging Needed” message, directing you to the dock. Refer to the owner’s manual or Shark support for a comprehensive list and detailed solutions for each error code encountered during operation.
Resolving Error Code Issues
Once an error code appears, consult the Shark app or owner’s manual for specific troubleshooting steps. For “Brushroll Stuck” errors, power off the robot, remove the brushroll, and clear any tangled hair or debris. “Wheel Stuck” errors require checking for obstructions and ensuring free wheel rotation.
If facing connectivity issues, reboot your router and re-establish the Wi-Fi connection within the Shark Clean app. For charging problems, verify the robot is correctly docked and the charging contacts are clean. If issues persist, contact Shark support for further assistance and potential repair options.
Safety Precautions
Always follow important safety instructions to avoid damage to the robot or potential hazards during operation and maintenance, ensuring safe usage.
Important Safety Instructions
To ensure safe operation, carefully read all instructions before using your Shark robot vacuum. This device is intended for indoor use only on floors. Do not use it outdoors or on wet surfaces. Keep the charging base away from water sources.
Never operate the robot with a damaged cord or plug. Avoid running the robot over loose cords or cables to prevent damage. Do not allow children to play with, on, or around the robot. Close supervision is necessary when used near children.
Always disconnect the robot from the charging base before performing any maintenance or cleaning. Do not attempt to disassemble or repair the robot yourself; contact Shark support for assistance.
Avoiding Damage to the Robot
Protect your Shark robot vacuum by keeping the area clear of small objects, loose cords, and fragile items before each cleaning cycle. Avoid areas with exposed electrical wiring or steep drops. Regularly inspect the brushroll for tangled hair and debris, removing them promptly to maintain optimal performance.
Do not use the robot on excessively wet floors or to pick up flammable liquids. Ensure the dustbin is emptied frequently to prevent overflow and potential motor strain. Avoid forceful impacts or dropping the robot, as this could damage internal components.
Proper maintenance and a clear cleaning path will significantly extend the lifespan of your robotic vacuum.

Warranty Information
Shark Robot Vacuums come with a warranty covering defects in materials and workmanship; details vary by model – see sharksupport.com for specifics.
Shark Robot Vacuum Warranty Details
Shark offers a limited warranty on its robot vacuums, typically covering one year for defects in materials and workmanship from the date of purchase. This warranty encompasses issues with the robot’s functionality, including motor problems or failures in the navigation system. However, it doesn’t cover issues arising from misuse, accidents, or normal wear and tear, such as brushroll degradation or filter replacements.
To make a warranty claim, you’ll generally need proof of purchase and should contact Shark customer support directly. They may request troubleshooting steps or ask you to ship the robot for inspection. The warranty may be voided if unauthorized repairs are attempted. Always refer to the specific warranty documentation included with your model for complete details.
Contacting Shark Support
For assistance with your Shark robot vacuum, several support channels are available. You can visit sharkaccessories.com for frequently asked questions, troubleshooting guides, and replacement parts. Direct contact can be made through Shark’s customer service phone line, offering real-time assistance with technical issues or warranty claims.
Additionally, Shark provides support via email, allowing you to submit detailed inquiries and receive responses from their support team. Online chat support may also be available on their website for immediate help. When contacting support, have your model number and purchase date readily available to expedite the process.